This is part 2 of my “Keyboard redefined” post. In part 1 I wrote about the tools and native ways I encountered to customize my keyboard.
I bought this Qisan Magicforce 68 mechanical keyboard, with a PC layout. A nice compact PC keyboard with proper arrow-keys. The main goal was to swap the Window (❖)- and Alt- keys for the Command (⌘)- and Option (⌥) keys.
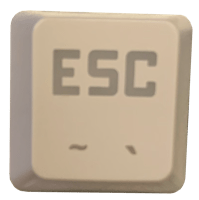
The keyboard has only 5 rows, the main reason to combine three keys into one Escape key. By default the function of this combined Escape-key can be modified with fn+q. Functional but not convenient. I prefer to have a dedicated key for grave accent (`) and tilde (~).
I looked at the macOS native options, invested some time exploring the available tools and decided to use Karabiner-Elements, Goku and Hammerspoon.
There is overlap in functionality between Karabiner-Elements and Hammerspoon. At first I used Karabiner-Elements only to swap the left-option (⌥) and left-command (⌘) key and a hyperkey for Hammerspoon. That didn’t work as nicely as I expected. In my current setup I use:
- Karabiner-Elements to manage the keyboard customizations,
- Goku to generate the Karabiner-Elements configuration file and
- Hammerspoon to do some automation tasks
Karabiner-Elements
![]()
My keyboard customizations are divided in three parts:
- Specific for the compact PC keyboard in my case the Qisan Magicforce 68
- Specific for the native Apple keyboards
- Generic shortcuts
Before we dive into Goku and the keyboard customizations first the application preferences.
Preferences
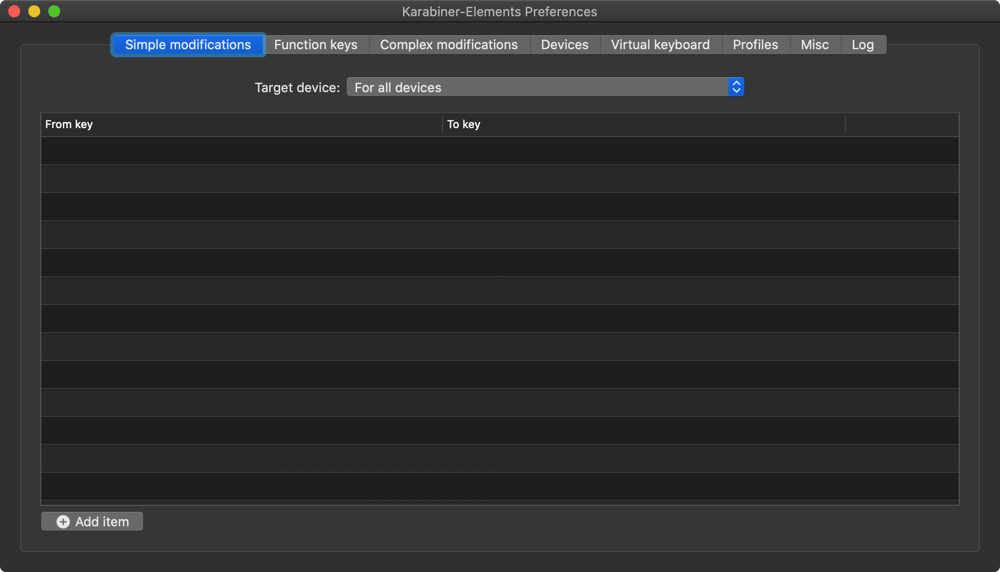
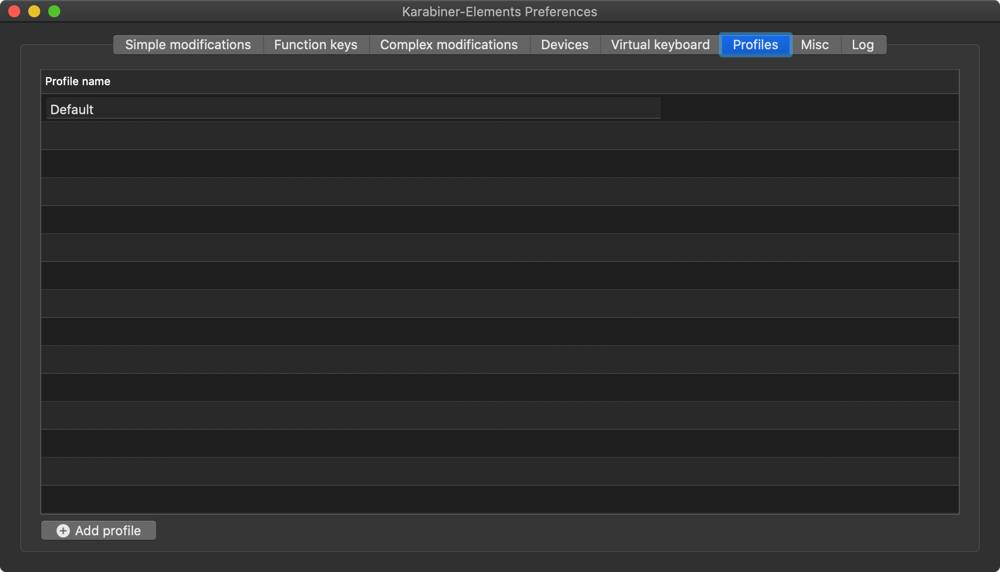
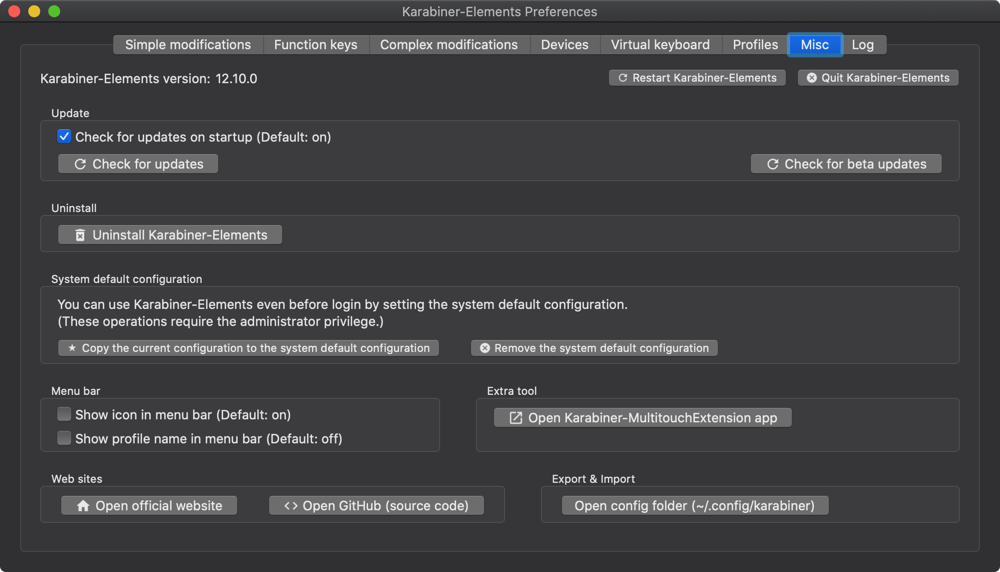
The preferences/configuration screens of my Karabiner-Elements setup.
Simple modifications
In part 1 an example was shown that swapped the left Option (⌥) and left Command (⌘) keys. My current configuration has no simple modifications.
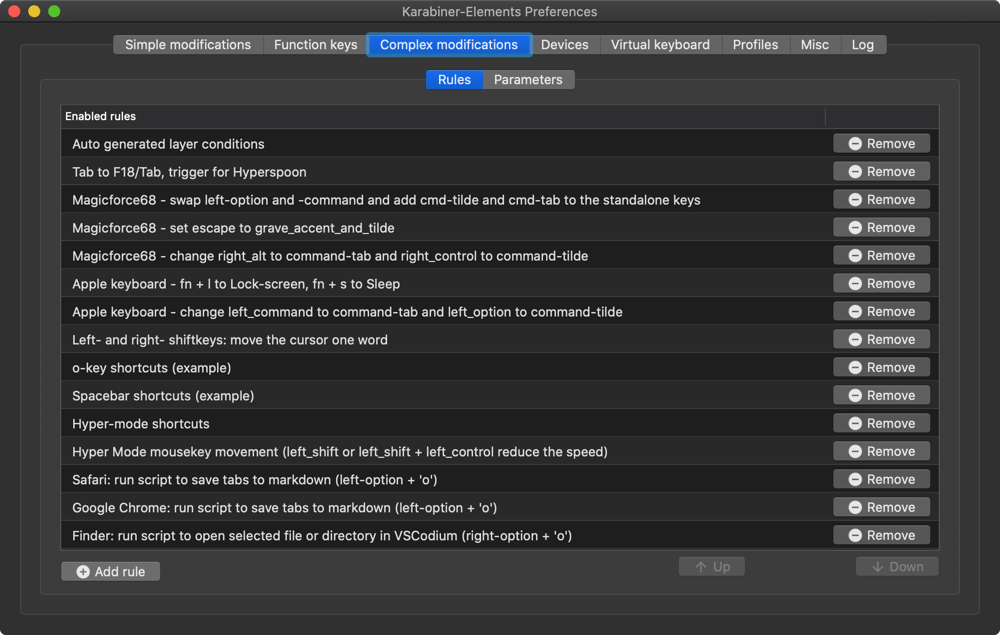
Complex modifications
Initially the “Complex modifications”-tab is empty. After running “Goku” this tab will be filled.
Devices
Under “Basic configuration” make sure your keyboard is selected (☑️).
Profiles
The “Default” profile is a requirement for Goku. In some cases you need to create the ‘Default’ profile in other cases you need to rename the profile to ‘Default’.
Misc
My menu bar is already filled with icons so I unchecked the option “Show icon in menu bar …”
Debugging
Karabiner-Elements comes with a very nice debugging tool, Karabiner-Eventviewer. When you work with Goku or directly with Karabiner-Elements this tool shows all keyboard events. An essential tool!
![]()
It happened to me a couple of times that the GUI of Karabiner-Elements or Karabiner-Eventviewer would not display. A work-around is to open the application from the commandline.
Open Karabiner-Elements from the CLI:
open -a "Karabiner-Elements"
or the Karabiner-Eventviewer
open -a "Karabiner-Eventviewer"
Goku
Goku generates the Karabiner-Elements configuration file ‘karabiner.json’ from the file ‘karabiner.edn’. The default location for this file is ‘.config’ directory.
~/.config$ tree
.
├── karabiner
│   ├── assets
│   │   └── complex_modifications
│   ├── automatic_backups
│   └── karabiner.json
└── karabiner.edn
The Goku/Karabiner file below is fully documented, including the specific workarounds for the Qisan “PC” keyboard. I created a cleaned version, without the “PC” keyboard mappings, for my colleague.
karabiner.edn
Some rules are commented-out, their purpose is either as alternative option for an existing command or as showcase of what is possible.
{
    ;; !  | means mandatory -   modifier(s) alone when pressend change behavior
    ;; #  | means optional  -   modifiers are optional (but atleast one necessary)

    ;; :!Ca is keycode :a and prefix a with !C

    ;; C  | left_command
    ;; T  | left_control
    ;; O  | left_option
    ;; S  | left_shift
    ;; F  | fn
    ;; Q  | right_command
    ;; W  | right_control
    ;; E  | right_option
    ;; R  | right_shift

    ;; ## | optional any
    ;; !! | command + control + optional + shift (hyper)

    ;; Install via brew: `brew install yqrashawn/goku/goku`

    ;; karabiner docs: ;; https://pqrs.org/osx/karabiner/json.html#complex_modifications-manipulator-definition
    ;; <other options> includs ~to_if_alone~, ~to_if_held_down~,~to_after_key_up~, ~to_delayed_action~ and ~parameters~.

    ;; (custom variables) & modifiers -> Advanced
    ;; https://github.com/yqrashawn/GokuRakuJoudo/blob/master/examples.org#custom-variable

    ;; Examples: https://github.com/yqrashawn/GokuRakuJoudo/blob/master/examples.org
    ;; https://gist.github.com/kaushikgopal/ff7a92bbc887e59699c804b59074a126
    ;; https://github.com/kchen0x/k-goku/blob/master/karabiner.edn

:profiles {
    :Default { :default true
        :sim     50     ;; simultaneous_threshold_milliseconds (def: 50)
                        ;; keys need to be pressed within this threshold to be considered simultaneous
        :delay   500    ;; to_delayed_action_delay_milliseconds (def: 500)
                        ;; basically it means time after which the key press is count delayed
        :alone   500    ;; to_if_alone_timeout_milliseconds (def: 1000)
                        ;; hold for 995s and single tap registered; hold for 1005s and seen as modifier
        :held    1000   ;; to_if_held_down_threshold_milliseconds (def: 500)
                        ;; key is fired twice when 500 ms is elapsed (otherwise seen as a hold command)
    }
} ;; profiles

:templates {
    :open "open -a '%s'"                                ;; :open "Safari"
    :openApp "open \"%s\""                              ;; :open "/Applications/Safari.app"
    :applescript "osascript '/Users/albert/Library/Mobile Documents/com~apple~ScriptEditor2/Documents/%s'"
                                                        ;; Full path to user's 'iCloud Drive/Script Editor'
                                                        ;; You can't use '~' for the users home directory
    :type "osascript -e 'tell application \"System Events\" to keystroke \"%s\" as text'"
    :beep "osascript -e 'beep'"                         ;; Play default beep
    :purr "afplay /System/Library/Sounds/Purr.aiff"     ;; Play the Purr sound
    :tink "afplay /System/Library/Sounds/Tink.aiff"     ;; Play the Tink sound
} ;; templates


:applications {                                         ;; Get the app id: `osascript -e 'id of app "VSCodium"'`
    :chrome ["^com\\.google\\.Chrome$"]
    :safari ["^com\\.apple\\.Safari$"]
    :firefox ["^org\\.mozilla\\.firefoxdeveloperedition$"]
    :finder ["^com\\.apple\\.finder$"]
    :code ["^com\\.visualstudio\\.code\\.oss$"
           "^com\\.microsoft\\.VSCode(Insiders)?$"
           "^com\\.microsoft\\.VSCode?"]
}

;; layers are basically "hyper" keys
;; press this in combination with something else and depending on your rule, make things happen
:layers {
    :hyper-mode {:key :caps_lock :alone {:key :escape}} ;; make the caps_lock key the hyper key
                                                        ;; In "System Preferences/Keyboard/Modifier Keys..."
                                                        ;; the Caps Lock Key is set to "No Action".
} ;; layers

;; simlayers are basically "hyper" keys
;; layers works too, but only recommended for non-typing keys like . or tab
;; or keys like z which are used less often
:simlayers {
    :e-mode {:key :e}                                   ;; make the e-key a simlayer key
    :o-mode {:key :o}                                   ;; make the o-key a simlayer key
    :space-mode {:key :spacebar}                        ;; make the spacebar a simlayer key
} ;; simlayers

;; Define different kinds of keyboards
:devices {
    :kb-apple [
        {:vendor_id 1452}                               ;; product_id 636 for MacBook Pro (15-inch, 2018) internal keyboard
        {:vendor_id 76}
    ]
    :magicforce68 [                                     ;; Qisan Magicforce 68 keyboard without backlight
        {:vendor_id 1241,
         :product_id 41208 }]
    :magicforce68-backlight                             ;; Qisan Magicforce 68 keyboard with backlight
       [{:vendor_id 1241,
         :product_id 36 }]

    :kb-all [                                           ;; Group with all keyboards
        {:vendor_id 1452}
        {:vendor_id 76}
        {:vendor_id 1241, :product_id 36 }
        {:vendor_id 1241, :product_id 41208 }
    ]

    :kb-magicforce68 [                                  ;; Group with Magicforce 68-key keyboards
        {:vendor_id 1241, :product_id 36 }
        {:vendor_id 1241, :product_id 41208 }
    ]
} ;; devices

;; main contains multiple manipulators
:main [
    ;; each manipulator has a description and multiple rules

    ;;{:des "..."                                       ;; -> description
    ;; :rules[
    ;;          [<from>  <to>  <conditions>]            ;; -> rule 1
    ;;          [<from>  <to>  <conditions>]            ;; -> rule 2
    ;; ]}

    ;; rule [:period ["period-mode" 1] nil {:afterup ["period-mode" 0] :alone :period}]
    ;;       |_____| |_______________| |_| |_________________________________________|
    ;;        <from>    <to>      <conditions>         <other options>

    ;; Tab is set to F18 as hyperkey for Hammerspoon, alone it acts as tab.
    {:des "Tab to F18/Tab, trigger for Hyperspoon, ehh Hammerspoon"
     :rules [
        [:##tab :f18 nil {:alone :tab}]
     ]
    }

    ;; The Magicforce keyboards have a PC layout, I swapped the Windows- and Alt-key on the left side.
    ;; Swapping the physical keys and virtually in karabiner-elements make the layout behave like a Mac keyboard.
    ;; It does require extra rules for combinations with other modifier keys.
    ;; This is the simplified version of the keycombinations below, so without the 'alone' functionality.
    ; {:des "Magicforce68 - swap left-option and left-command"
    ;  :rules [ :kb-magicforce68
    ;     [:##left_command :left_option]
    ;     [:##left_option :left_command]
    ;     [:!Sleft_option :!Sleft_command]                ;; fix for shift_option
    ;     [:!Sleft_command :!Sleft_option]                ;; fix for shift_command
    ;     [:!Tleft_option :!Tleft_command]                ;; fix for control_option
    ;     [:!Tleft_command :!Tleft_option]                ;; fix for control_command
    ;  ]
    ; }

    ;; The Magicforce keyboards have a PC layout, I swapped the Windows- and Alt-key on the left side.
    ;; Swapping the physical keys and virtually in karabiner-elements make the layout behave like a Mac keyboard.
    ;; Additional shortcut for command+tab to switch between the current and previous application
    ;; Additional shortcut for command+tilde to cycle through the open windows of an application
    ;; It does require extra rules for combinations with other modifier keys.
    {:des "Magicforce68 - swap left-option and -command and add cmd-tilde and cmd-tab to the standalone keys"
     :rules [ :kb-magicforce68
        [:left_command :left_option nil {:alone [:!Cgrave_accent_and_tilde]}]
        [:left_option :left_command nil {:alone [:!Ctab]}]
        [:!Sleft_option :!Sleft_command]                ;; fix for shift_option
        [:!Sleft_command :!Sleft_option]                ;; fix for shift_command
        [:!Tleft_option :!Tleft_command]                ;; fix for control_option
        [:!Tleft_command :!Tleft_option]                ;; fix for control_command
     ]
    }

    ;; The Magicforce is a 68 key keyboard with a combined escape_grave_accent_and_tilde key.
    ;; Capslock alone is set to behave like the Escape-key, with this setting the key is
    ;; forced to tilde and grave-accent.
    ;; Additional rule required for command-tilde behaviour.
    ;; Note: On the backlight version there is an override with Fn-Q.
    {:des "Magicforce68 - set escape to grave_accent_and_tilde"
     :rules [ :kb-magicforce68
        [:escape :grave_accent_and_tilde]
        [:!Cescape :!Cgrave_accent_and_tilde]
     ]
    }

    ;; The function key on Apple keyboards can be used in Karabiner,
    ;; it does not work for the function key on my Qisan-Magicfoce keyboard.
    {:des "Apple keyboard - fn + l to Lock-screen, fn + s to Sleep"
     :rules [ :kb-apple
        [:!Fl [:!CTq]]                                  ;; Function + l to Lock Screen (Command-Control-Q)
        [:!Fs [:!COeject]]                              ;; Function + s to Sleep (Command-Option-Eject)
     ]
    }

    ;; Shortcut `command` for command+tab to switch between the current and previous application
    ;; Shortcut `option` for command+tilde to cycle through the open windows of an application
    ;; Shortcut `control` for control+tab to go to the next tab in most applications
    ;; Due to the switched left-option and -command on the Magicforce keyboard, two rules are excluded.
    ;; Functonality for the left-option and left-command is handled in the Magicforce specific rules.
    ;; Command-tab s not implemented in the same way across applications. This results either in looping
    ;; through the tabs or toggling between two tabs. To create the same experience everywhere specific
    ;; sequences need to be build. For VSCodium I experimented with with Ctrl+tab twice.
    {:des "Change command to cmd+tab, option to cmd+tilde and control to ctrl+tab when pressed `alone`"
     :rules [
        [:##left_command :left_command [:!kb-magicforce68] {:alone [:!Ctab]}]
        [:##left_option :left_option [:!kb-magicforce68] {:alone [:!Cgrave_accent_and_tilde]}]
        [:##left_control :left_control [:!code] {:alone [:!Ttab]}]
        [:##left_control :left_control [:code] {:alone [:!Ttab :!Ttab]}]
        [:##right_command :right_command nil {:alone [:!Ctab]}]
        [:##right_option :right_option nil {:alone [:!Cgrave_accent_and_tilde]}]
        [:##right_control :right_control [:!code] {:alone [:!Wtab]}]
        [:##right_control :right_control [:code] {:alone [:!Wtab :!Wtab]}]
     ]
    }

    ;; Use the left and right shift-key to move the cursor one word left or right.
    {:des "Left- and right- shiftkeys: move the cursor one word"
     :rules [
        [:##left_shift :left_shift nil {:alone :!Oleft_arrow }]
        [:##right_shift :right_shift nil {:alone :!Eright_arrow}]
     ]
    }

    ;; Use e-key key to launch apps or actions
    {:des "e-key shortcuts"                             ; Hold 'e' + extra key
     :rules [ :e-mode
        [:m [:!TCspacebar]]                             ; 'm' - Emoji picker
     ]
    }

    ;; Use o-key to launch apps or actions
    ;; Mostly examples
    {:des "o-key shortcuts (example)"                   ; Hold 'o' + extra key
     :rules [ :o-mode
        [:s [:open "Safari"]]                           ; 's' - Open Safari
        [:t [[:type "Moi,oet Grunn!"]]]                 ; 't' - Type some text
        [:b [:beep]]                                    ; 'b' - beep
        [:p [:purr]]                                    ; 'p' - play "Purr"
        [:k [:tink]]                                    ; 'k' - play "Tink"
     ]
    }

    ;; Use spacebar to launch apps or actions
    ;; Mostly as example
    {:des "Spacebar shortcuts (example)"                ; Hold 'space' + extra key
     :rules [ :space-mode
        [:slash [:open "Finder"]]                       ; '/' - Open Finder
        [:p [:open "Preview"]]                          ; 'p' - Open Preview
     ]
    }

    ;; Use caps_lock key to launch apps or actions
    {:des "Hyper-mode shortcuts"                        ; Hold 'caps_lock' + extra key
     :rules [ :hyper-mode
        [:l [:!CTq]]                                    ; 'l' - Lock Screen
        [:m [:!TCspacebar]]                             ; 'm' - Emoji picker
        [:slash [:open "Finder"]]                       ; '/' - Open Finder
        [:p [:open "Preview"]]                          ; 'p' - Open Preview
        [:s [:open "Safari"]]                           ; 's' - Open Safari
        [:f [:open "Firefox Developer Edition"]]        ; 'f' - Open Firefox
        [:k [:open "Kubernetic"]]                       ; 'k' - Open Kubernetic
        [:g [:open "Google Chrome"]]                    ; 'g' - Open Google Chrome
        [:t [:open "iTerm"] [:!code]]                   ; 't' - Open iTerm 'console' or 'commandline'
        [:y [:open "Typora"]]                           ; 'y' - Open Typora
        [:v [:open "VSCodium"]]                         ; 'v' - Open VSCodium
        [:4 [:!TSC4]]                                   ; '4' - Screenshot to clipboard
        [:5 [:!SC5]]                                    ; '5' - Screenshot and recording options
     ]
    }

    ;; Borrowed and modified from kchen0x/k-goku, interesting feature, not sure how and when to use it.
    ;; Hyperkey (caps_lock) + arrow key to move the cursor
    ;; Hyperkey (caps_lock) + shift + arrow key to move the cursor at half the speed
    ;; Hyperkey (caps_lock) + left_shift + left_control + arrow key to move the cursor at quarter the speed
    ;; Hyperkey + return for mouse button 1
    ;; Hyperkey + command + return for mouse button 2
    {:des "Hyper Mode mousekey movement (left_shift or left_shift + left_control reduce the speed)"
     :rules [ :hyper-mode
        [:down_arrow {:mkey {:y 1200}}]
        [:up_arrow {:mkey {:y -1200}}]
        [:left_arrow {:mkey {:x -1200}}]
        [:right_arrow {:mkey {:x 1200}}]
        [:!Sdown_arrow {:mkey {:y 600}}]
        [:!Sup_arrow {:mkey {:y -600}}]
        [:!Sleft_arrow {:mkey {:x -600}}]
        [:!Sright_arrow {:mkey {:x 600}}]
        [:!TSdown_arrow {:mkey {:y 300}}]
        [:!TSup_arrow {:mkey {:y -300}}]
        [:!TSleft_arrow {:mkey {:x -300}}]
        [:!TSright_arrow {:mkey {:x 300}}]
        [:return_or_enter {:pkey :button1}]
        [:!Creturn_or_enter {:pkey :button2}]
     ]
    }

    ;; Borrowed from kchen0x/k-goku, interesting feature, not sure if I want to use it.
    ; {:des "Quit application by pressing command-q twice"
    ;  :rules [[:!C#Pq [:!Cq ["command-q" 0]] ["command-q" 1]]
    ;          [:!C#Pq ["command-q" 1] nil {:delayed {:invoked ["command-q" 0] :canceled ["command-q" 0]}}]
    ;  ]
    ; }

    ;; Attempt to do a double tap with the left-control key. Double tap works but control-c fails.
    ;; Double tap the left-control to bring up the emoji-picker.
    ; {:des "Open emoji-picker by pressing left-control twice"
    ;  :rules [
    ;     [:##left_control [:!TCspacebar  ["left_control_twice" 0]] ["left_control_twice" 1]]
    ;     [:##left_control ["left_control_twice" 1] ["left_control_twice" 0]
    ;       {:delayed {:invoked [:left_control ["left_control_twice" 0]] :canceled ["left_control_twice" 0]} :held [:##left_control]}
    ;     ]
    ;  ]
    ; }

    ;; Browser specific: save all tabs to a markdown file.
    ;; Option + 'o' saves all tabs to a MarkDown file
    ;; Info on the used AppleScript: "https://tisgoud.nl/2020/04/saving-the-yak-browser-trail/"
    ;; and some fun examples
    {:des "Safari: run script to save tabs to markdown (left-option + 'o')"
     :rules [ :safari
        [:!Os [:applescript "SaveSafariTabsToMarkdown.scpt"]]
                                                        ;; Examples of other possible functions
        [:!Oa "say 'now we are in Safari'"]
        [:!Of ["osascript -e 'tell app \"Finder\" to make new Finder window'"]]
        [:!Oh ["osascript -e 'display dialog \"Hello from Karabiner-elements\" with title \"This must be Safari!\"'"]]
     ]
    }

    ;; Browser specific: save all tabs to a markdown file.
    ;; Option + 'o' saves all tabs to a MarkDown file
    ;; Info on the used AppleScript: "https://tisgoud.nl/2020/04/saving-the-yak-browser-trail/"
    {:des "Google Chrome: run script to save tabs to markdown (left-option + 'o')"
     :rules [ :chrome
        [:!Os [:applescript "SaveChromeTabsToMarkdown.scpt"]]
     ]
    }

    ;; Finder specific: open selected file or directory in VSCodium.
    ;; Info on the used AppleScript: "https://tisgoud.nl/2019/09/open-in-vscodium/"
    {:des "Finder: run script to open selected file or directory in VSCodium (right-option + 'o')"
     :rules [ :finder
        [:!Eo [:applescript "Open in VSCodium.scpt"]]   ;; right_option + 'o' to open the file or folder in VSCodium
     ]
    }

    ;; Use caps_lock key to launch apps or actions in VSCode/VSCodium
    ;; When the same keycode is used as general rule/shortcut, '!code' is required on the original rule
    {:des "VSCode/VSCodium shortcuts"                   ; Hold 'caps_lock' + extra key
     :rules [ :code :hyper-mode
        [:t [:!TSgrave_accent_and_tilde]]               ; 't' - Open terminal
     ]
    }

] ;; main

} ;; EOF
With the following command the new ‘karabiner.json’ file is generated.
$ goku
Done!
Karabiner-Elements reloads the configuration automatically and all rules show up in Karabiner-Elements under the “complex modifications” tab.
The latest version of the ‘karabiner.edn’ file can be found on github/tisGoud/goku.
Hammerspoon
![]()
After instalation of Hammerspoon you need to create the configuration file ‘init.lua’ in the ‘~/.hammerspoon’ directory. It’s possible to put everything in one large file but I chose to separate functionality per file and use the ‘require’ option to load the different .lua files.
Hammerspoon directory structure
The Hammerspoon directory with the separation of functionality per .lua file:
~/.hammerspoon$ tree
.
├── hyper.lua
├── init.lua
├── showmousepointer.lua
├── Spoons
│   └── MouseCircle.spoon
├── wifinotifier.lua
└── windowmanagement.lua
In the next paragraphs I will explain the functionality per file.
init.lua
The init file loads four different .lua files and watches the configuration directory for changes.
If something in the configuration changes, the configuration is reloaded and a notification is displayed.
-----------------------------------------------
-- Init.lua
-----------------------------------------------
require "hyper"
require "showmousepointer"
require "windowmanagement"
require "wifinotifier"

-----------------------------------------------
-- Reload config on write
-----------------------------------------------
local function reload_config()
  hs.reload()
end

hs.pathwatcher.new(os.getenv("HOME") .. "/.hammerspoon/", reload_config):start()
hs.alert.show("Hammerspoon config (re)loaded")
hyper.lua
The Hyper-file creates a “hyper-key” in Hammerspoon.
Within Karabiner-Elements the Tab key is bound to fn18, a non-existing key on my keyboard.
The ‘hyper’ variable can now be used to bind a key to the ‘hyper’ key to trigger an action.
Many hyper-key implementations in Hammerspoon use the ‘hyper:exit()’ function to send a keystroke when the hyper-key was not triggered. This smells like a bad entanglement.
To keep the separation as clean as possible the “non-triggering” is handled by Karabiner-Elements.
With just two lines of code, a very clean hyper-key implementation.
-----------------------------------------------
-- Hyper.lua
-----------------------------------------------

-- The clean modal keybindings are made possible due to a comment from Steve Kehlet (github/skehlet),
-- he mentioned that there is no need to assign a key to the modal key.
-- With that a much cleaner piece of code.
-- Sending a keystroke when the hyper-key is not triggered is handled by Karabiner-Elements.
-- In Karabiner-Elements the 'tab'-key is set to f18/escape.

hyper = hs.hotkey.modal.new()
f18 = hs.hotkey.bind({}, "f18", function () hyper:enter() end, function () hyper:exit() end)
showmousepointer.lua
The Showmousepointer-file is an example of how a Spoon can be called from a .lua file. Download the MouseCircle Spoon from the repository and unzip it in the “Spoons” directory.
The spoon draws a circle around the mouse pointer.
I tried to bind the hyper key with the key ’m' but I could not get that working. Therefore Control + m.
-----------------------------------------------
-- Showmousepointer.lua
-----------------------------------------------

hs.loadSpoon("MouseCircle")

-- 'red' is the default color
spoon.MouseCircle.color = hs.drawing.color.hammerspoon.green

spoon.MouseCircle:bindHotkeys({
  show = { "ctrl" , "m" }
})
wifinotifier.lua
The WifiNotifier-file is an example of an automation not triggered by a keybinding but by a change of the WiFi network. On change it displays a message with the name of the network.
As example I used the hs.notify as well as the hs.alert APIs.
This might become the base of an automated VPN setup triggered by an untrusted network.
-----------------------------------------------
-- WiFinotifier.lua
-----------------------------------------------

-- Current functionality is just a notification with the network name
-- Would be nice to turn on a VPN on an untrusted WiFi network

wifiWatcher = nil
homeSSID = "tisgoud"
workSSID = ""
lastSSID = hs.wifi.currentNetwork()

function ssidChangedCallback()
    newSSID = hs.wifi.currentNetwork()

    if newSSID == homeSSID and lastSSID ~= homeSSID then
        -- We just joined our home WiFi network
        hs.notify.new({title="WiFI", informativeText=string.format("Connected to %q", homeSSID)}):send()
    elseif newSSID ~= homeSSID and lastSSID == homeSSID then
        -- We just departed our home WiFi network
        hs.alert.show(string.format("WiFi connected to %q", newSSID), 3)
    end

    lastSSID = newSSID
end

wifiWatcher = hs.wifi.watcher.new(ssidChangedCallback)
wifiWatcher:start()
windowmanagement.lua
The WindowManagement file enables you to move and resize windows with your keyboard. From all the possibilities my Hammerspoon configuration offers this is the most used automation.
I came across this already modified file and modified it a bit more, there is also a Spoon for Window management but I haven’t tried it.
-----------------------------------------------
-- WindowManagement.lua
-----------------------------------------------
-- Original Work Copyright (c) 2016 Miro Mannino
-- Modified Work Copyright (c) 2017 Rosco kalis
--   Modifications:
-- - Made original functionality work with Hyper Mode
-- - Added next/previous monitor functionality
-- - Added Fullscreen toggle functionality
-- Modified Work Copyright (c) 2020 Albert W. Alberts
--   Modifications:
-- - Removed 'left' + 'right' and 'up' + 'down' key combinations
--   to change size to full width or heighth.
-- - Added extra 'size'-value to step to full width or heighth

-- Permission is hereby granted, free of charge, to any person obtaining a copy of this
-- software and associated documentation files (the "Software"), to deal in the Software
-- without restriction, including without limitation the rights to use, copy, modify, merge,
-- publish, distribute, sublicense, and/or sell copies of the Software, and to permit persons
-- to whom the Software is furnished to do so, subject to the following conditions:
--
-- The above copyright notice and this permission notice shall be included in all copies
-- or substantial portions of the Software.
--
-- THE SOFTWARE IS PROVIDED "AS IS", WITHOUT WARRANTY OF ANY KIND, EXPRESS OR IMPLIED,
-- INCLUDING BUT NOT LIMITED TO THE WARRANTIES OF MERCHANTABILITY, FITNESS FOR A PARTICULAR
-- PURPOSE AND NONINFRINGEMENT. IN NO EVENT SHALL THE AUTHORS OR COPYRIGHT HOLDERS BE LIABLE
-- FOR ANY CLAIM, DAMAGES OR OTHER LIABILITY, WHETHER IN AN ACTION OF CONTRACT, TORT OR
-- OTHERWISE, ARISING FROM, OUT OF OR IN CONNECTION WITH THE SOFTWARE OR THE USE OR OTHER
-- DEALINGS IN THE SOFTWARE.

hs.window.animationDuration = 0.0

-----------------------------------------------
-- Functionality
-----------------------------------------------

local sizes = {2, 3, 3/2, 1/4}
local fullScreenSizes = {1, 4/3, 2}

local GRID = {w = 24, h = 24}
hs.grid.setGrid(GRID.w .. 'x' .. GRID.h)
hs.grid.MARGINX = 0
hs.grid.MARGINY = 0

local pressed = {
  up = false,
  down = false,
  left = false,
  right = false
}

function nextStep(dim, offs, cb)
  if hs.window.focusedWindow() then
    local axis = dim == 'w' and 'x' or 'y'
    local oppDim = dim == 'w' and 'h' or 'w'
    local oppAxis = dim == 'w' and 'y' or 'x'
    local win = hs.window.frontmostWindow()
    local id = win:id()
    local screen = win:screen()

    cell = hs.grid.get(win, screen)

    local nextSize = sizes[1]
    for i=1,#sizes do
      if cell[dim] == GRID[dim] / sizes[i] and
        (cell[axis] + (offs and cell[dim] or 0)) == (offs and GRID[dim] or 0)
        then
          nextSize = sizes[(i % #sizes) + 1]
        break
      end
    end

    cb(cell, nextSize)
    if cell[oppAxis] ~= 0 and cell[oppAxis] + cell[oppDim] ~= GRID[oppDim] then
      cell[oppDim] = GRID[oppDim]
      cell[oppAxis] = 0
    end

    hs.grid.set(win, cell, screen)
  end
end

function nextFullScreenStep()
  if hs.window.focusedWindow() then
    local win = hs.window.frontmostWindow()
    local id = win:id()
    local screen = win:screen()

    cell = hs.grid.get(win, screen)

    local nextSize = fullScreenSizes[1]
    for i=1,#fullScreenSizes do
      if cell.w == GRID.w / fullScreenSizes[i] and
         cell.h == GRID.h / fullScreenSizes[i] and
         cell.x == (GRID.w - GRID.w / fullScreenSizes[i]) / 2 and
         cell.y == (GRID.h - GRID.h / fullScreenSizes[i]) / 2 then
        nextSize = fullScreenSizes[(i % #fullScreenSizes) + 1]
        break
      end
    end

    cell.w = GRID.w / nextSize
    cell.h = GRID.h / nextSize
    cell.x = (GRID.w - GRID.w / nextSize) / 2
    cell.y = (GRID.h - GRID.h / nextSize) / 2

    hs.grid.set(win, cell, screen)
  end
end

function fullDimension(dim)
  if hs.window.focusedWindow() then
    local win = hs.window.frontmostWindow()
    local id = win:id()
    local screen = win:screen()
    cell = hs.grid.get(win, screen)

    if (dim == 'x') then
      cell = '0,0 ' .. GRID.w .. 'x' .. GRID.h
    else
      cell[dim] = GRID[dim]
      cell[dim == 'w' and 'x' or 'y'] = 0
    end

    hs.grid.set(win, cell, screen)
  end
end

function prevMonitor()
  local win = hs.window.focusedWindow()
  local nextScreen = win:screen():previous()
  win:moveToScreen(nextScreen)
end

function nextMonitor()
  local win = hs.window.focusedWindow()
  local nextScreen = win:screen():next()
  win:moveToScreen(nextScreen)
end

-----------------------------------------------
-- Shortcut bindings
-----------------------------------------------

hyper:bind({}, "down", function()
  pressed.down = true
  nextStep('h', true, function(cell, nextSize)
    cell.y = GRID.h - GRID.h / nextSize
    cell.h = GRID.h / nextSize
  end)
end, function()
  pressed.down = false
end)

hyper:bind({}, "right", function()
  pressed.right = true
  nextStep('w', true, function(cell, nextSize)
    cell.x = GRID.w - GRID.w / nextSize
    cell.w = GRID.w / nextSize
  end)
end, function()
  pressed.right = false
end)

hyper:bind({}, "left", function()
  pressed.left = true
  nextStep('w', false, function(cell, nextSize)
    cell.x = 0
    cell.w = GRID.w / nextSize
  end)
end, function()
  pressed.left = false
end)

hyper:bind({}, "up", function()
  pressed.up = true
  nextStep('h', false, function(cell, nextSize)
    cell.y = 0
    cell.h = GRID.h / nextSize
  end)
end, function ()
  pressed.up = false
end)

hyper:bind({}, "f", function()
  nextFullScreenStep()
end)

hyper:bind({"shift"}, "left", function()
  prevMonitor()
end)

hyper:bind({"shift"}, "right", function()
  nextMonitor()
end)

hyper:bind({}, "return", function()
  local win = hs.window.frontmostWindow()
  win:setFullscreen(not win:isFullscreen())
end)
Hammerspoon tip
Working with Karabiner-Elements and Hypersoon can be confusing due to the naming convention used for the keys. From the Hammerspoon console the following command can be called to display all the keycodes:
hs.inspect(hs.keycodes.map)
Shortcuts, remappings and automations
The following sections give an overview of the shortcuts, mappings and automations
Qisan Magicforce68 keyboard specific settings
The specific settings for my compact Qisan Magicforce68 keyboard
| Shortcut | Keystroke | Function |
|---|---|---|
| left-option | left-⌘ | swapping option and command |
| left-command | left-⌥ | swapping command and option |
| Escape | ` | Escape to ` |
| Shift+Escape | ~ | Shift + Escape to ~ |
| right-Command | ⌘ + Tab | Toggle current and previous app |
| right-Option | ⌘ + ~ | Cycle app windows |
Apple keyboard specific settings
The specific Apple keyboard setting involve the use of the ‘fn’ or function key. I was unable to address the function key on my Qisan keyboard.
| Shortcut | Keystroke | Function |
|---|---|---|
| fn + l | ⌘ + ⌃ + q | Lock screen |
| fn + s | ⌘ + ⌥ + Eject | Sleep |
Generic shortcuts
You might wonder why there are 5 hyper-keys, yes it is to much but I’m still figuring out which hyperkey location is most convenient. The position of your hands above the keyboard is an important factor in this. Using the capslock as hyper key is also a good option due to the size of the key.
| Shortcut | Keystroke | Function |
|---|---|---|
| Capslock | Escape | hyper-key |
| Tab | Tab / fn18 | Hammerspoon hyper-key |
| e | e | hyper-key |
| Command (l/r) | ⌘ + Tab | Toggle current and previous app |
| Option (l/r) | ⌘ + ~ | Cycle app windows |
| Control (l/r) | ⌃ + Tab | Cycle app tabs |
| left-Shift | ⌥ + left-Arrow | Move cursor one word left |
| right-Shift | ⌥ + right-Arrow | Move cursor one word right |
| e + m | ⌘ + ⌃ + Space | Open Emoji picker |
| Capslock + l | ⌘ + ⌃ + q | Lock screen |
| Capslock + m | ⌘ + ⌃ + Space | Open Emoji picker |
| Capslock + \ | Open Finder | |
| Capslock + s | Open Safari | |
| Capslock + f | Open Firefox | |
| Capslock + k | Open Kubernetic | |
| Capslock + g | Open Google Chrome | |
| Capslock + t | Open iTerm | |
| Capslock + y | Open Typora | |
| Capslock + v | Open VSCodium | |
| Capslock + 4 | Screenshot to clipboard | |
| Capslock + 5 | Screenshot and recording options | |
| Capslock + arrow | Move mouse fast | |
| left-Option + s | Safari: Save tabs to markdown | |
| left-Option + s | Chrome: Save tabs to markdown | |
| right-Option + o | Finder: Open in VSCodium | |
| Capslock + t | VSCodium: Open terminal pane |
Example shortcuts
Some shortcuts to test stuff.
| Shortcut | Keystroke | Function |
|---|---|---|
| o | o | hyper-key |
| Spacebar | Spacebar | hyper-key |
| o + s | Open Safari (example) | |
| o + t | Type some text (example) | |
| o + b | Play beep sound (example) | |
| o + p | Play Purr sound (example) | |
| o + k | Play Tink sound (example) | |
| e + m | ⌘ + ⌃ + Space | Open Emoji picker (example) |
| Spacebar + \ | Open Finder (example) | |
| Spacebar + p | Open Preview (example) |
Hammerspoon shortcuts and automations
| Shortcut | Function |
|---|---|
| Control + m | Draw circle around mousepointer |
| Tab + Arrow | Window: Move and Resize (repeat) |
| Tab + f | Window: Next full screen step (repeat) |
| Tab + Return | Window: Toggle full screen |
| n.a. | Wifi notifier |
Recap
I enjoyed generating the Karabiner-config with Goku and these tools became part of my standard configuration.
Hammerspoon, is for me still in a test phase. I only scratched the surface of it’s possibilities but I have my doubts, so far my most used function is the windowmanagement and there is a commandline tool yabai that could do just that or one of the many other windowmanagement tools.
Keyboard Maestro might be a good automation alternative but not right now. First I want to use the current configuration for a while before jumping on that bandwagon.
Playing around with these tools was fun, I learned a lot but it also turned out to be very time-consuming. Let’s hope it was worth the investment 😉